
Driving safely through bends is something that eventually becomes quite natural. An experienced driver will often assess the road ahead, adjust their speed, select the right gear and negotiate the bend without consciously thinking about every individual step.
For a learner driver, however, simply going for a drive and seeing what happens isn’t always the best way to develop that judgement.
There is a process that can be taught.
At Fantoni Driving School, we teach learners how to break bend assessment down into manageable stages. That includes recognising the bend early, reading the information available, judging how severe it is likely to be, choosing an appropriate speed and gear, and considering what may be beyond the part of the road they can’t yet see.
As experience develops, these individual decisions gradually become part of normal driving.
This guide explains the structured approach we use during lessons. It’s designed to give learner drivers something practical they can use during their own learning process.
The photographs throughout this guide were taken on roads used for practical driving tests around Northallerton. They provide real examples of the bends learners may encounter while developing their driving skills and preparing for their test.
The aim isn’t to give you a fixed speed for every bend or a set of rules to memorise. It’s to help you understand how to assess an unfamiliar bend and make a structured decision about how you’re going to drive it.
1. Recognise the Bend Early
The first skill is recognising a bend early enough to prepare for it properly.
Some of the information will be obvious. A triangular warning sign may tell you that a bend is approaching, while black-and-white chevrons can draw your attention to a significant change in direction.
But you shouldn’t rely solely on signs. Not every bend will be signposted, particularly on rural roads.
Look further ahead and start building a picture of where the road is going. Useful information can include the direction of hedges and trees, telegraph poles or pylons, road markings and the position or angle of approaching vehicles.
Most importantly, look at the road itself. Where does it disappear from view and how quickly?
The earlier you recognise the bend, the more time you have to prepare for it.
2. Judge How Severe the Bend Is
Recognising that a bend is coming is only the beginning. You then need to decide how severe it is likely to be.
One way we introduce this during lessons is by stopping somewhere safe before a suitable bend and asking the learner to study it.
What’s the furthest point of the road you can see?
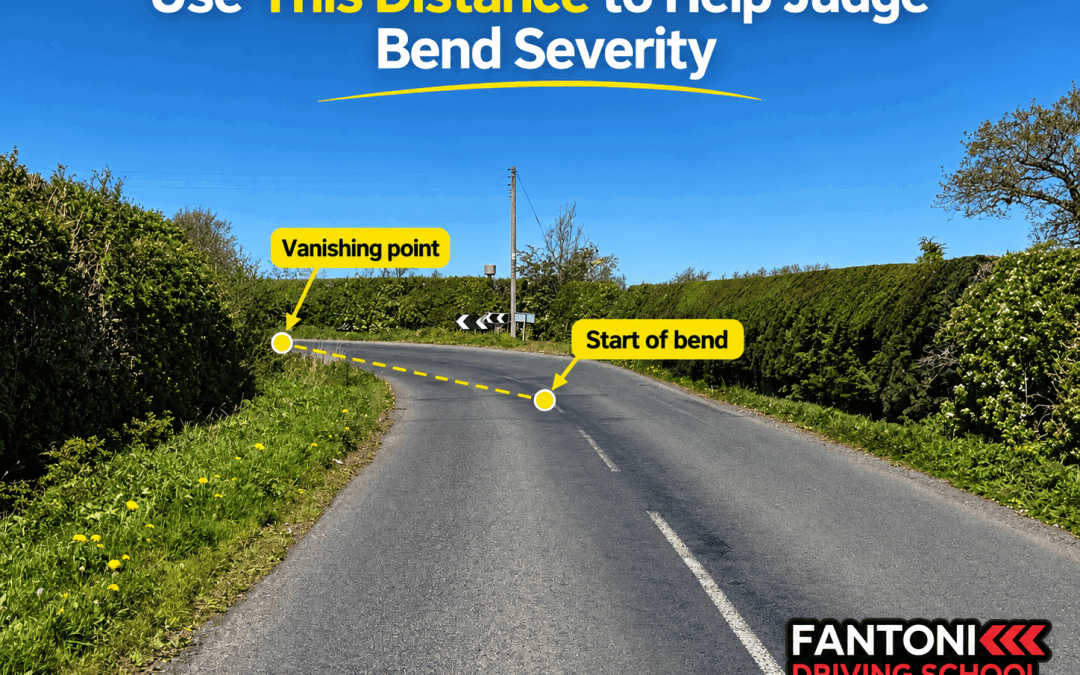
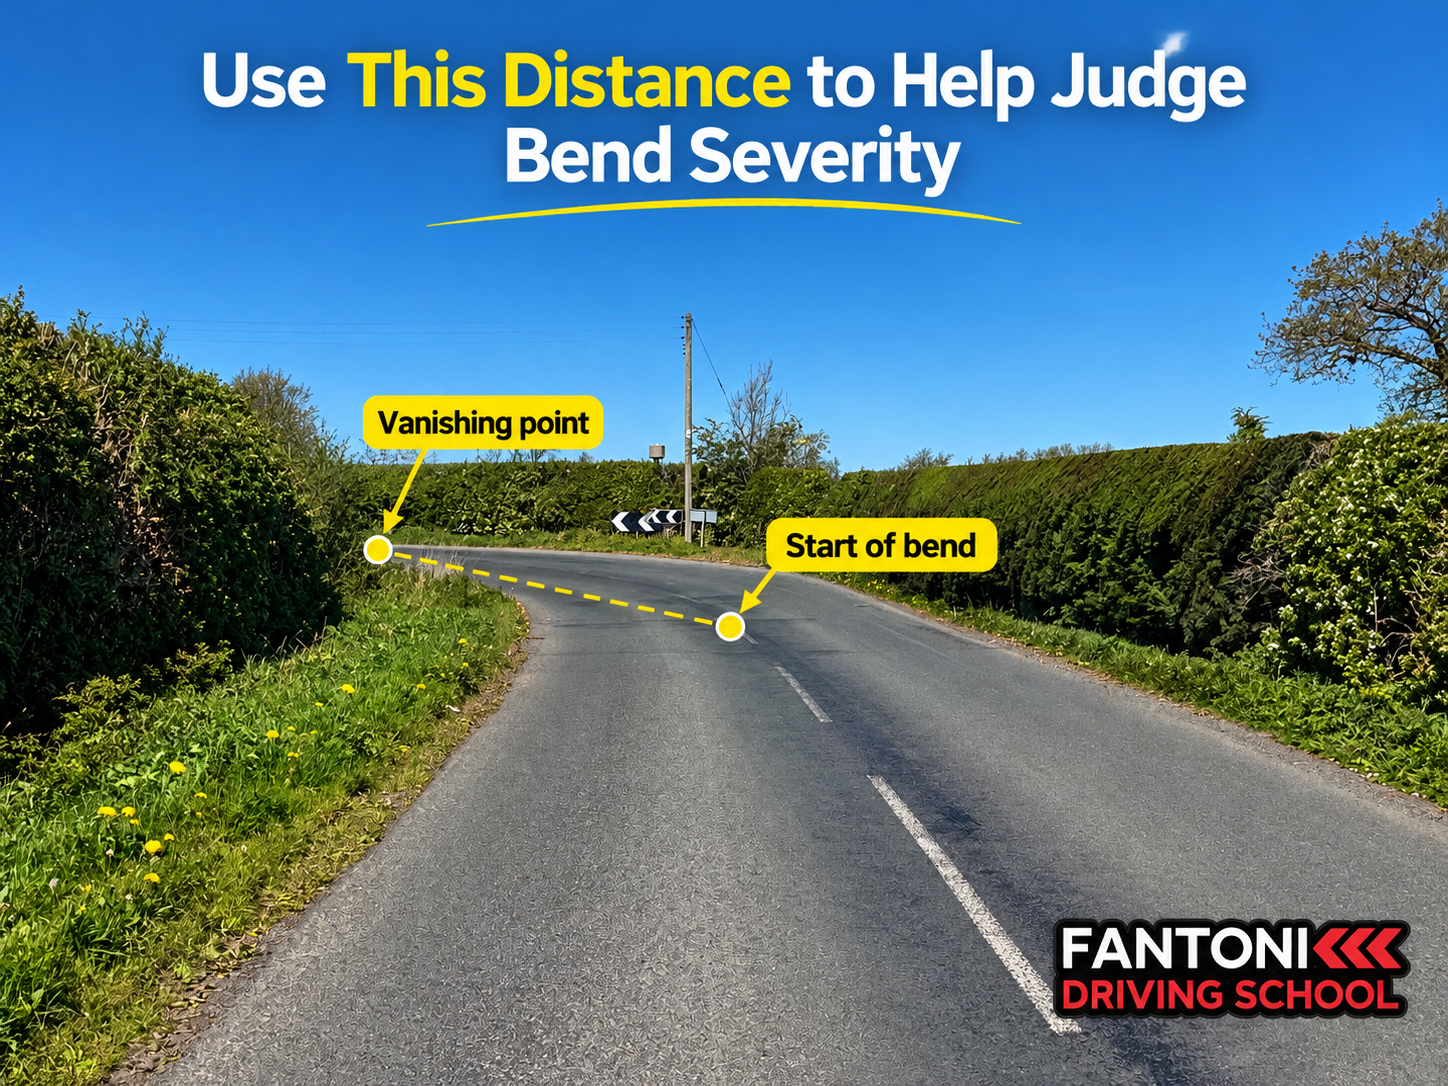
This is your limit point – essentially the furthest point of road currently visible to you.
We can then ask the learner to estimate the distance between the start of the bend and the limit point.
The exact answer isn’t particularly important. The purpose is to get the learner thinking about distance and available view. This distance provides a useful clue about the bend, but it should also be considered alongside the road’s shape, width and any restrictions to visibility.
If you can only see a very short distance around the bend – perhaps the equivalent of one or two car lengths – that should influence the speed you choose.
We can relate this to something the learner already understands. If you’ve previously negotiated a tight 90-degree corner in a built-up area at around 10–15mph, a country bend with a similarly restricted view may require a similarly low speed, or even less, depending on the distance available and the conditions.
This isn’t about learning a fixed speed for a particular type of bend. It’s about learning to relate what you can see to the speed you’re travelling at.
3. Learn to Recognise the Easier Bends Too
Good bend assessment doesn’t mean slowing substantially for every bend.
Learners also need to recognise the difference between a severe bend and a much more open one.
This is something we often teach on the move.
A learner might already be travelling through a bend when we ask:
“How far can you see ahead?”
If they can still see 200 or 300 yards of road, we can compare that with one of the much tighter bends we’ve previously negotiated.
“Would you describe this as being as sharp as the bends we drove earlier?”
Over time, the learner starts distinguishing between a bend where the road disappears very quickly and one where a considerable amount of road remains visible.
There will be bends requiring a substantial reduction in speed. There will also be open bends where, subject to the speed limit, road conditions and other hazards, considerably less speed needs to be lost.
The aim is to develop judgement, not simply caution.
4. Plan for What You Can’t See
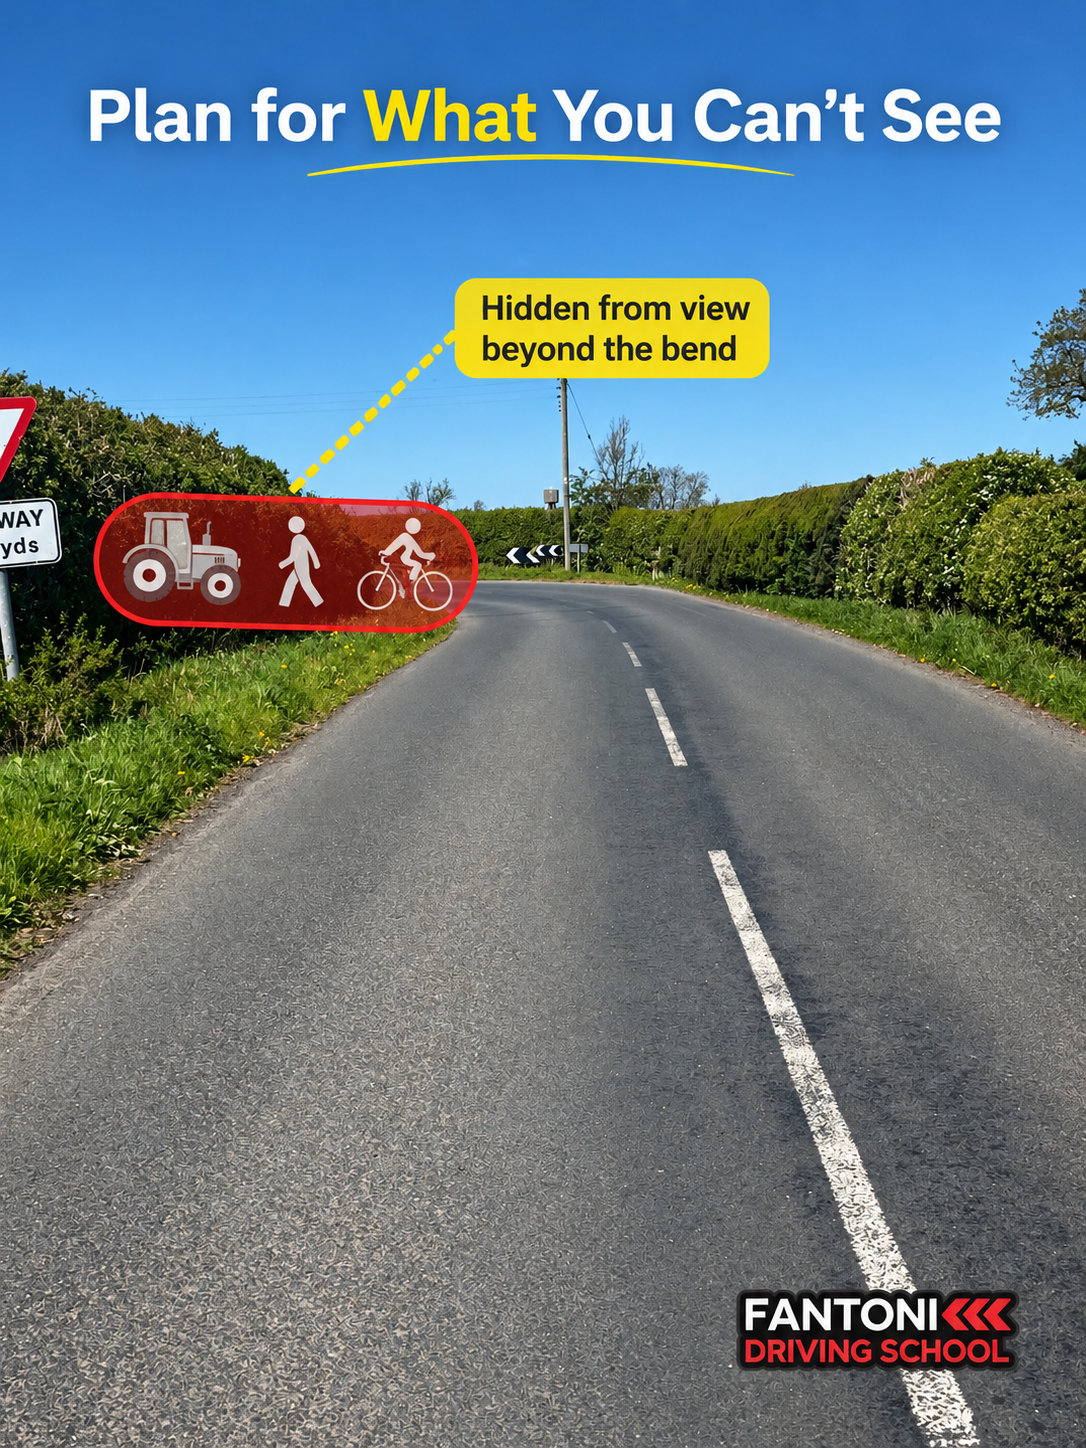
The next consideration is what could reasonably be beyond the part of the road you can’t see.
On a country road, that could be a wider vehicle occupying more of the road than expected, a pedestrian walking towards you in the road or a broken-down vehicle.
These shouldn’t automatically become emergency-stop situations.
Your approach speed should give you enough time and space to deal smoothly with a reasonably foreseeable hazard if it appears.
One question we can use with learners is:
“What hazards might we reasonably anticipate around this bend?”
The purpose isn’t to imagine everything that could possibly go wrong. It’s to consider what you could realistically encounter on that particular road.
Match Your Speed to Your View
The amount of road you can see to be clear should influence your speed.
If we’re negotiating a tight 90-degree bend and can only see approximately one or two car lengths ahead, we may need to travel at a very low speed. Even in dry conditions, the speed must be low enough to allow us to stop safely within the limited distance available.
Another rough teaching example we sometimes use is that if you can see approximately 15–20 metres of clear road ahead, a speed of around 15–20mph may be appropriate in good, dry conditions, depending on the actual stopping distance available.
These aren’t fixed speeds for bends. They are reference points to help learners start relating distance, visibility and speed to one another. The speed must always allow the driver to stop safely within the distance they can see to be clear.
For that reason, it’s also useful for learners to develop a reasonable understanding of what 10 metres, 20 metres or a couple of car lengths actually look like.
5. Take Extra Care With Left-Hand Bends
Left-hand bends can be particularly easy to misjudge.
On a left-hand bend, you may be able to see further across towards the opposite side of the carriageway. This can create the impression that you have a greater view around the bend than you actually have within your own side of the road.
Instead, concentrate on the useful view available on your side of the road.
On a right-hand bend, the restriction to your view will often be on your own side of the road, which can make the available distance easier to appreciate.
Simply understanding this difference can help learners make a more accurate assessment of left-hand bends.
6. Brake Before the Bend
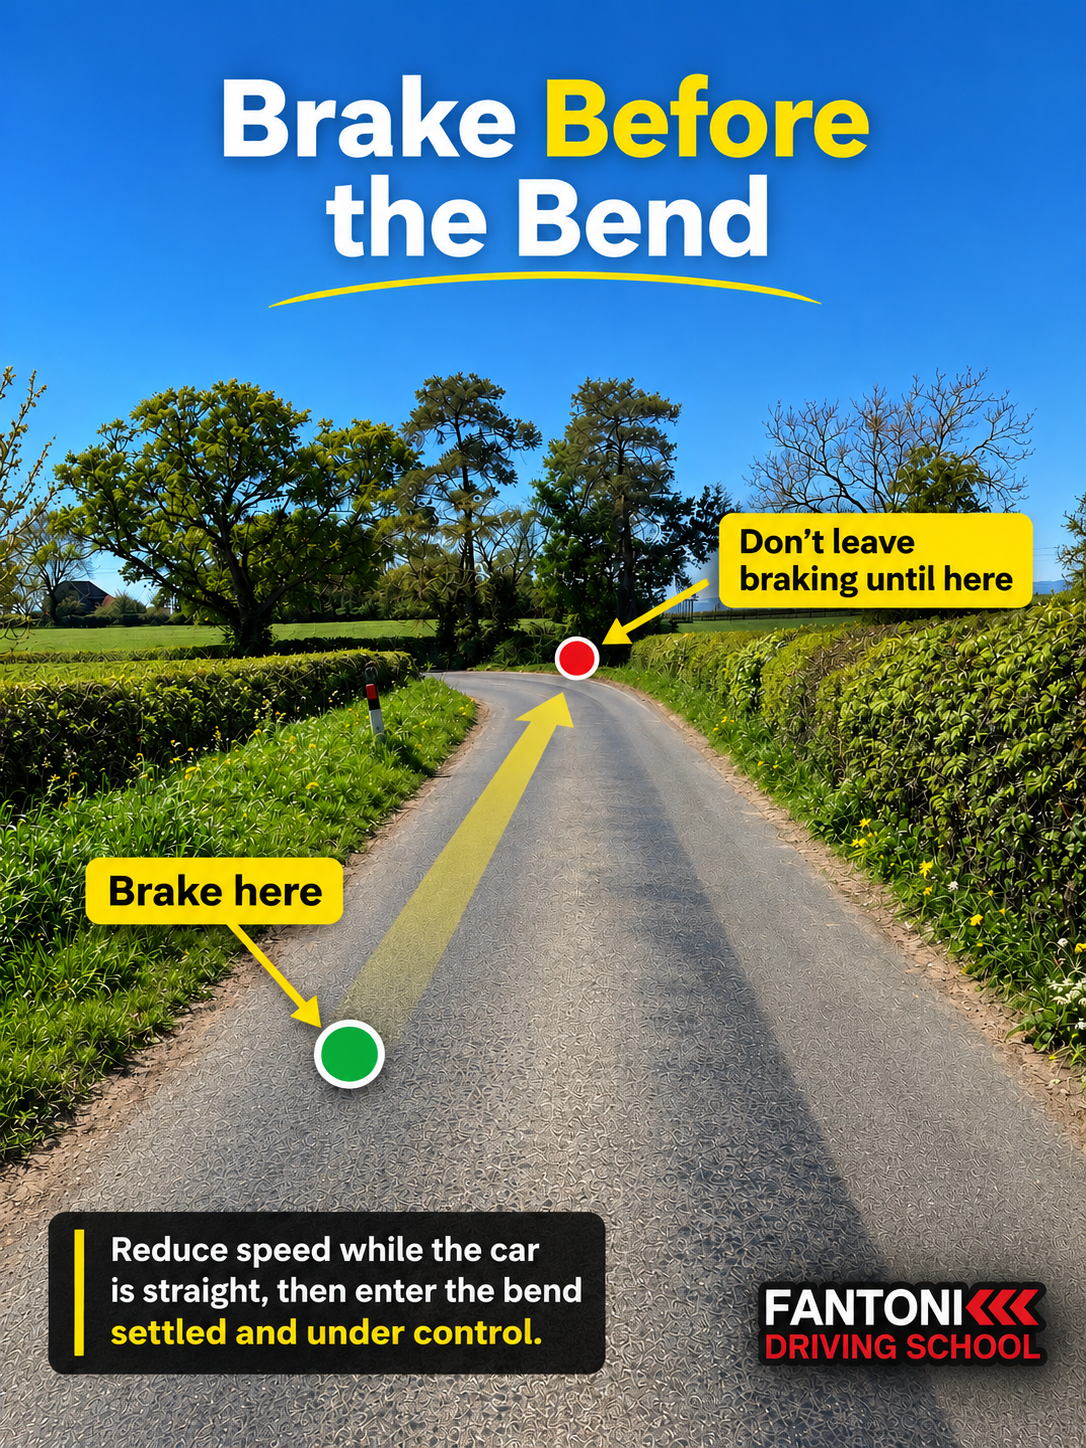
Once you’ve assessed the bend and decided how much speed you need to lose, aim to complete the main braking while the car is still travelling in a straight line.
This avoids asking the tyres to deal with significant braking and cornering forces at the same time and helps the car remain settled as you begin steering.
Leaving the braking too late can mean arriving at the bend with too much speed and then having to continue braking while already turning. As the car negotiates the bend, load transfers towards the outside tyres. Additional braking places further demands on the available grip.
A better approach is to prepare the car beforehand:
Mirrors → reduce speed on the straight → select the gear → clutch fully up → enter the bend.
Select the Gear Before You Turn
The gear should also be selected before entering the bend, with the clutch fully back up.
Trying to steer accurately while simultaneously changing gear gives the learner more to do at the point where accurate steering and positioning are particularly important.
At the instructed stage, we may tell the learner exactly which gear to use:
“Check your centre mirror, gradually reduce your speed and now select third gear before we enter the bend.”
On a particularly tight bend or narrow country lane, that instruction might instead be to select second gear.
As the learner becomes more experienced, responsibility for that decision gradually transfers to them.
7. Keep the Car Settled Through the Bend
Once you’re travelling around the bend at the chosen speed, the objective isn’t to immediately start building speed again.
On a tighter bend, the car may feel as though it’s doing little more than idling around it. A small amount of accelerator can be used to maintain the chosen speed and keep the car settled, but we’re not trying to accelerate out of a bend we still can’t see through.
Keep looking ahead.
As the available view begins to extend and the limit point starts moving further away, you’re receiving more information about where the road is going.
That’s when progressive acceleration can begin, provided the road and conditions allow it.
In simple terms:
Prepare on the straight → enter at an appropriate speed → keep the car settled → continue looking ahead → accelerate as the view opens.
8. Positioning Around the Bend
For most bends, maintain a safe and appropriate position on your side of the road.
On some right-hand bends, there may be an opportunity to position slightly further to the left. This can improve your view around the bend and give you more information about what lies ahead.
Any adjustment should be made early and should never compromise your safety margin from the edge of the road, pedestrians, cyclists or other hazards.
For learner drivers, positioning should remain straightforward: stay safely on your side of the road, maintain an appropriate safety margin and look as far through the bend as the available view allows.
9. From Instruction to Independence
We don’t expect a learner to make all these decisions independently from the beginning.
Initially, the instruction might be quite specific:
“Can you see the warning signs for the bend? Check your centre mirror. Gently brake here while we’re still on the straight. Now select second gear. Bring the clutch fully back up before we enter the bend.”
As the learner develops, instruction can become prompting:
“What hazard can you see ahead?”
“What are you going to check before slowing down?”
“How much speed do you need to lose?”
“Which gear are you going to use?”
Eventually, those prompts should disappear.
The learner should recognise the bend, assess it, prepare the car and negotiate it without the instructor having to tell them what to do.
10. Common Mistakes When Learning to Drive Bends
Learning to judge bends takes practice. Learners aren’t expected to get all of this right immediately.
Here are some of the mistakes we regularly see during lessons.
Recognising the Bend Too Late
If you haven’t recognised the bend early enough, you’ve given yourself less time to check your mirrors, reduce your speed, select the gear and position the car correctly.
Everything becomes rushed.
Braking Too Late – or Not Firmly Enough
Late braking is an obvious problem, but there’s another version we see regularly.
The learner starts braking at a reasonable point but doesn’t apply enough pressure to reach the speed they need before the bend.
Sometimes this is simply because they’re still developing a feel for the brakes. They may also be reluctant to slow more firmly because another vehicle is travelling behind them.
Either way, they arrive at the bend carrying more speed than intended.
Not Deciding on a Speed
Some learners approach the bend without having made any real decision about the speed they want to be travelling at when they reach it.
They’re effectively waiting to see what happens.
We want the learner to start making that assessment beforehand. It doesn’t mean deciding that every particular type of bend must be taken at a predetermined speed. It means looking at the bend, the available view and the conditions and beginning to form a judgement before arriving.
Going Too Slowly
Over-caution can also indicate that the learner hasn’t yet learned to assess the road properly.
If you can see hundreds of yards through a relatively open bend, treating it like a tight 90-degree corner may be unnecessary.
This can sometimes be linked to uncertainty with steering or a lack of confidence. With experience, learners should become better at distinguishing between bends that require a substantial reduction in speed and those that don’t.
Choosing the Wrong Gear
Some learners don’t change down when a lower gear would give them better control.
At the opposite extreme, a learner might select first gear for a sharp 90-degree bend when second gear would have been perfectly adequate.
The gear should suit the speed and the bend rather than being selected automatically.
Drifting Towards the Centre of the Road
This is particularly important on right-hand bends.
Learners can sometimes allow the car to drift towards the centre of the road as they steer. With approaching traffic, that can quickly become dangerous.
Speed isn’t the only consideration. Accurate positioning needs to be maintained throughout the bend.
Forgetting the Mirrors
Mirrors should be checked before slowing.
There’s another mirror check that learners sometimes forget: before increasing speed again afterwards.
A vehicle behind may have started overtaking, particularly if you’ve needed to travel slowly through the bend. Checking the mirrors before accelerating gives you an updated picture of what’s happening behind before changing your speed.
Give the Judgement Time to Develop
There’s quite a lot happening here.
The learner is combining observation, speed assessment, braking, gears, steering and positioning while still developing their basic control of the car.
Sometimes the answer is simply more practice.
During lessons, we may break the process into smaller parts, repeat it over several different bends and then revisit it later. It’s quite common for a learner to return to something on another lesson and find that a skill which previously required considerable help has started to make much more sense.
The eventual goal is straightforward: when you encounter an unfamiliar bend, you should be able to read the road early, choose an appropriate speed and position, prepare the car before you arrive and deal smoothly with whatever you can reasonably expect to find beyond it.
Learn to Drive with Fantoni Driving School
At Fantoni Driving School, we use structured coaching to help learners develop the observation, judgement and vehicle-control skills needed for safe, independent driving.
We provide driving lessons in Ripon, Harrogate and surrounding areas, with an emphasis on clear explanations, practical feedback and building confidence as skills develop.
To find out more about our lessons, visit Fantoni Driving School.